

 Svara med citat

 2001 Softail FLSTF
Där kom lite frågor som jag med har funderat på, håller på och byter till ett 14" apa.


tjapp,åller på att byta till ett 16"apäng....eldragningen e klar,frambroms e klar....men nu ska jag på gas oc koppling....finns det någon step-by-step tråd eller andra tips....har aldrig gjort det förut,
men vill göra det själv för att lära mig,oc för att jag gjort allt annat på hojen själv...hitills....
Där kom lite frågor som jag med har funderat på, håller på och byter till ett 14" apa.
Det er enkelt dersom man har servicemanualen. De som vil ha den (2008 Dyna servicemanual PDF) kan sende meg en PM.


Japp.Ursprungligen postat av apebobber

Lite snabbt:
Gaswire, börja uppifrån i handtaget, lossa de båda "bumerang"-rörens justeringsmuttrar så wirarna blir slappa, AKTA de små nipplarna, lätt att bli av med. EV får tanken lossas för att kunna komma åt.
Koppling, samma här, släpp justeringen på främre rambenet så denna blir slapp på så sätt kan du ta av hästskosprinten som håller kopplingshandataget, ta ut den lilla cylindern från öglan på wiren.

VIKTIGT! Information gällande tekniska frågor!
Inte medlem på HarleyForum.se? Registrera dig helt gratis här!
Men hur ser det ut i andra änden på kopplingswiren den som går in i sidan på växelådan?
Måste man ta dän kåpan på växelådan? Tömma ut oljan? Behöver man något specailverktyg?
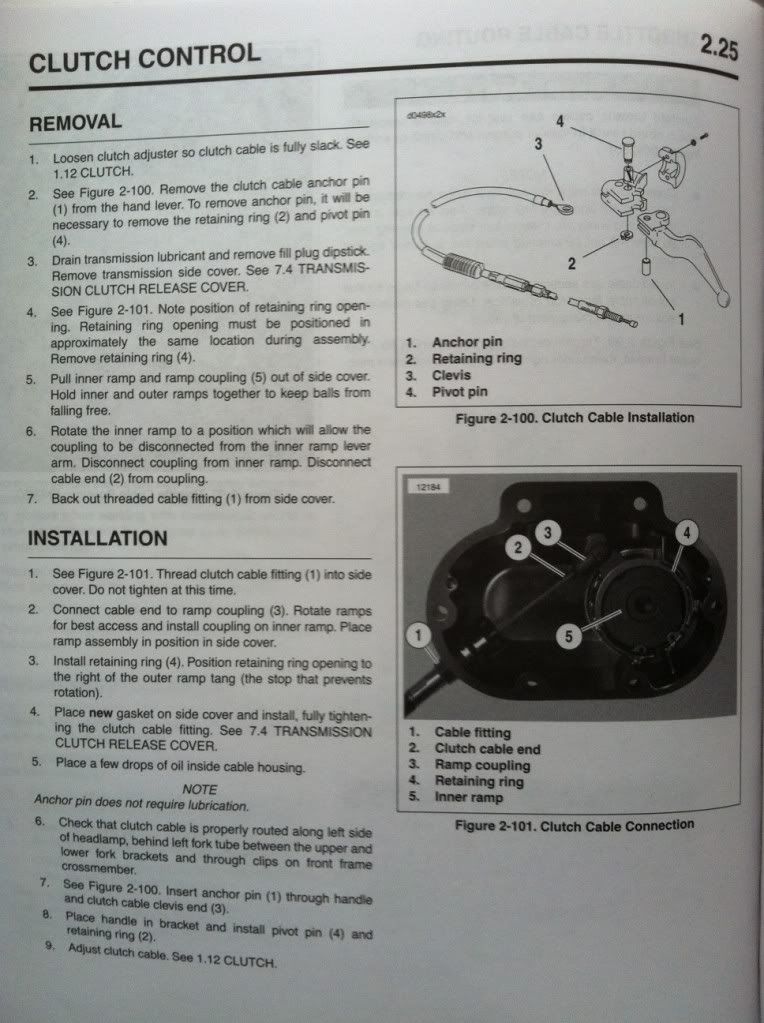
Ja, du måste ta av kåpan, och helst byta packning. En snap-ringstång är vad som behövs för att plocka ut tramspaketet, därefter kommer du åt själva kabeln. Ny olja behövs oxo då du får tömma den gamla. Ska ta bilder från servicemanualen imorgon, och lägga upp till er. Väldigt bra att ha!
Titta på denna länken för att få ett hum!
http://www.harley-davidsonforums.com...spd-trans.html
VIKTIGT! Information gällande tekniska frågor!
Inte medlem på HarleyForum.se? Registrera dig helt gratis här!
Bilder, saxade från amerikanska forumet: Från en Harley-Davidson Dyna 2005 men liknande förfarande.
Left hand tired from yanking that clutch all the time? I installed a "Easyboy Lite Clutch Lever Kit" by BURLY, in my 1995 Dyna and posted the install to help anyone who's interested in doing it to their bike.
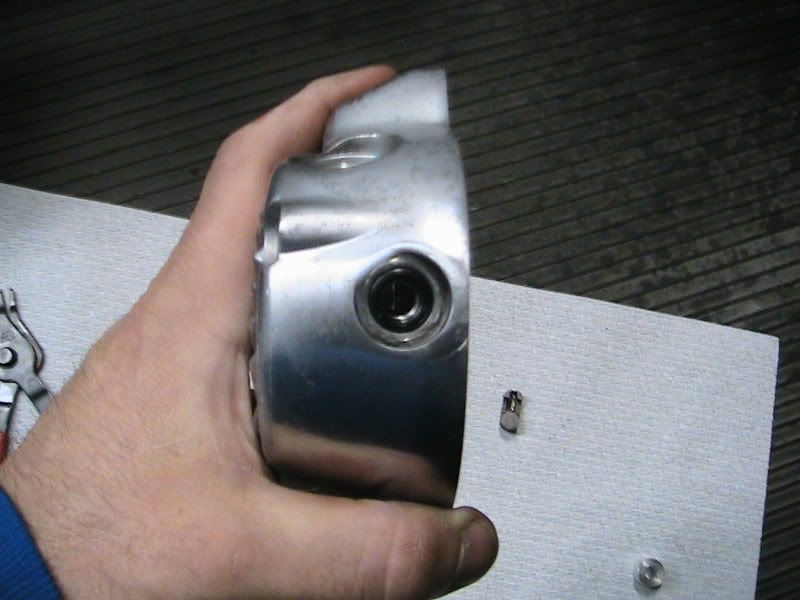
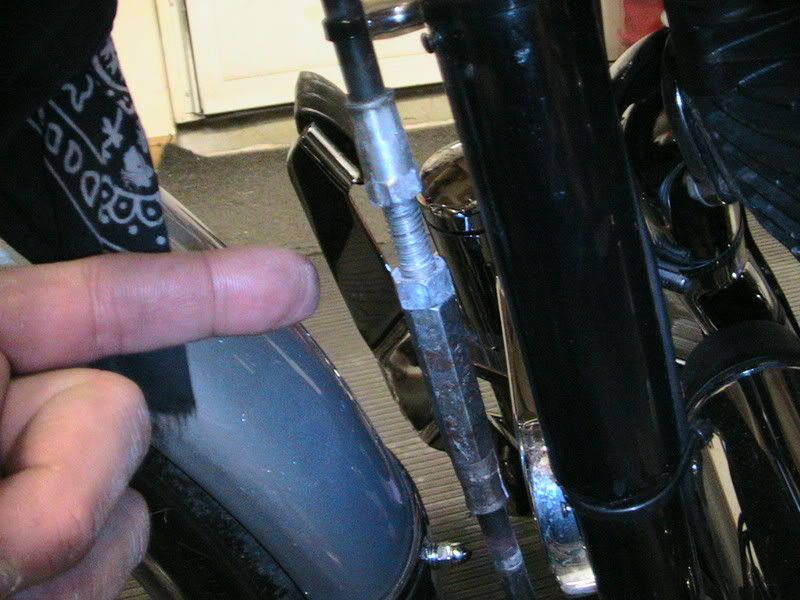
Pull your clutch cable adjusting boot back, or in my case, remove the blingy cover. Unadjust your cable by loosening the lock nut and running the barrel all the way inside the adjuster.
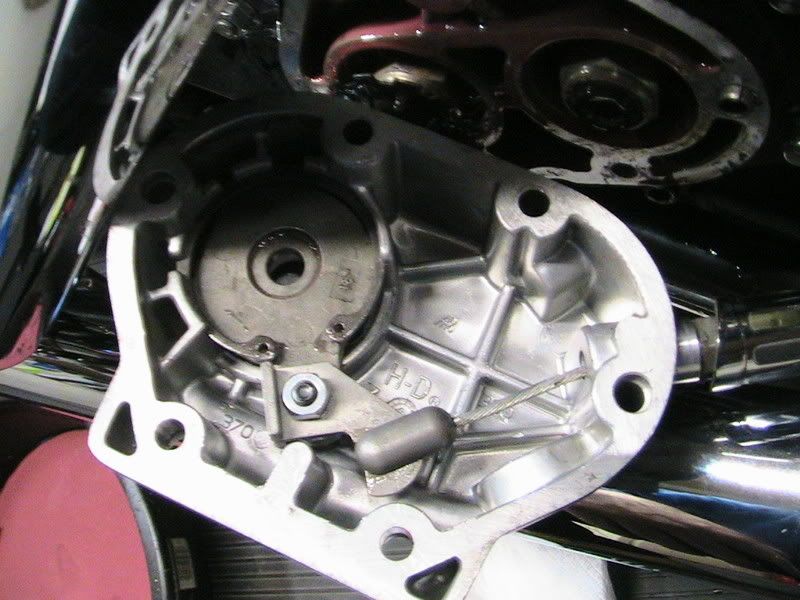
Place a drain pan under your trans, and drain the fluid out. You may not have to drain it all as the cover is elevated while the bike's on the jiffy -stand, but I was due anyway.
Next, take out your dipstick and remove the 6 allen screws from the cover. Once out, you may have to tap the cover with a rubber mallet to break the seal from the old gasket. Make sure you get a new gasket for the reinstall, as the old one usually tears.
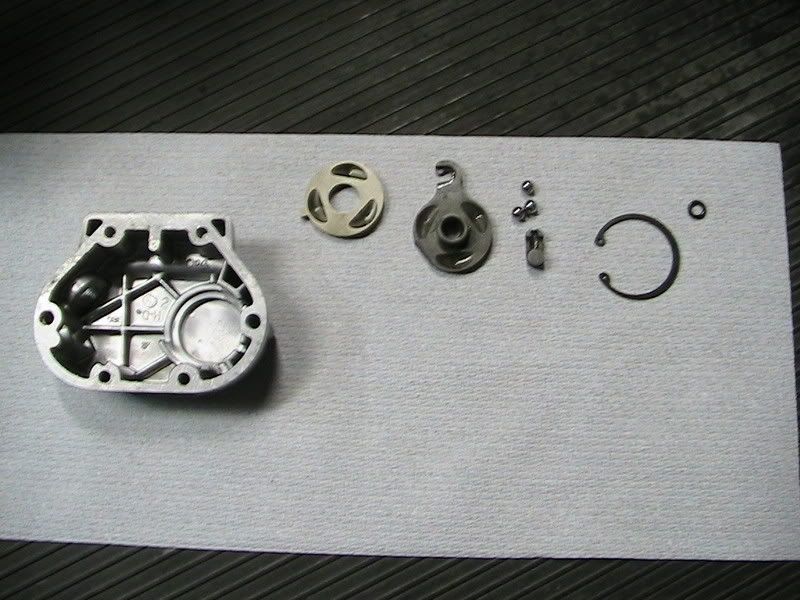
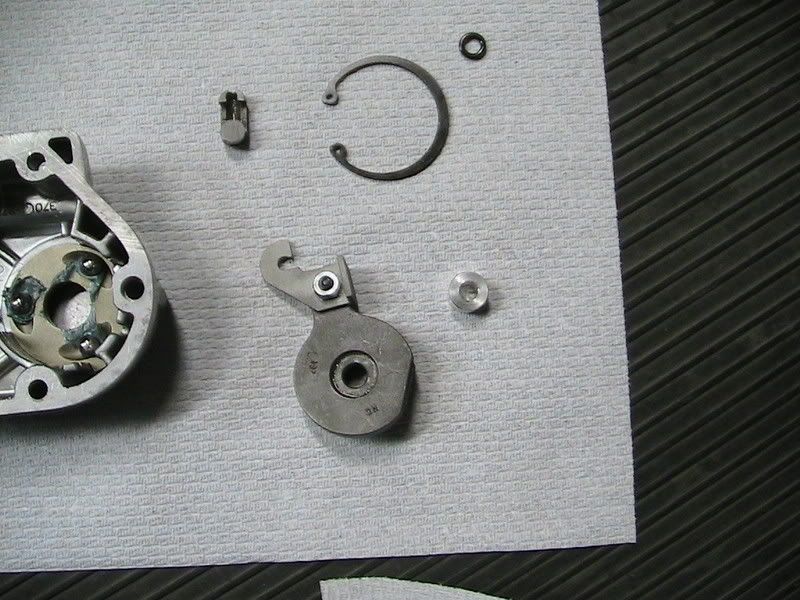
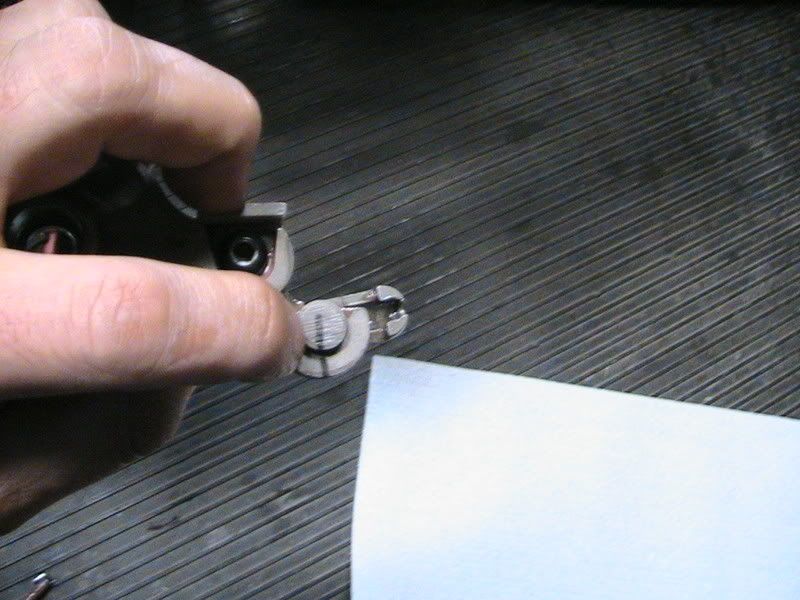
Remove the cover. Once the cover is off, there's a large C-Clip holding the mechanism together in the cover. You need to remove that C-clip to get the outer ramp/rotator out, to turn it and release the end of the cable. You'll note after the clip comes out, there are only a few pieces.
1.) Outer rotator/ramp
2.) Inner ramp
3.) 3 balls
4.) small cable end retaining arm
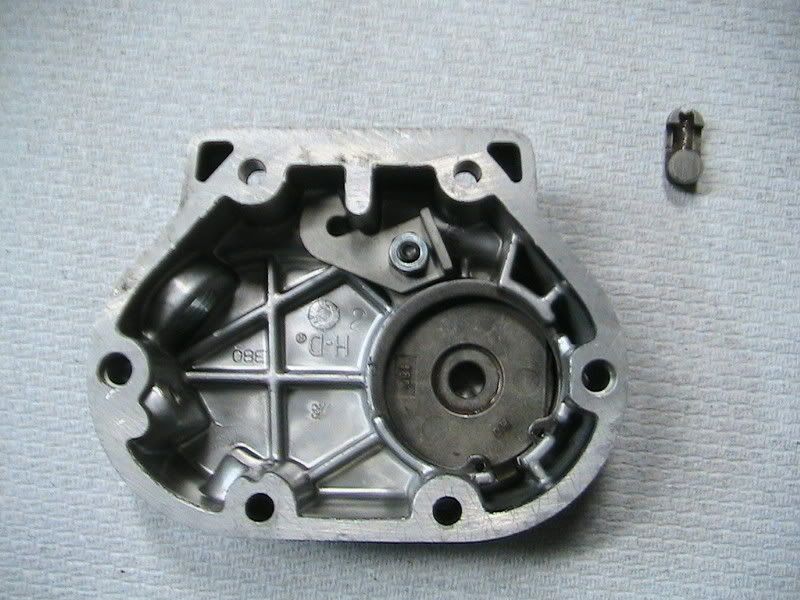
After you've removed the cover's internals, you can now thread the cable housing OUT of the cover. Righty-tighty, Lefty-loosey. You'll need to do this to add the supplied spacer on the cable housing.
There's an O-Ring where the cable meets the housing. Retain it, or replace it depending on its condition. Make sure you see it before putting things back together, or your trans will leak at the housing, where the cable goes in.
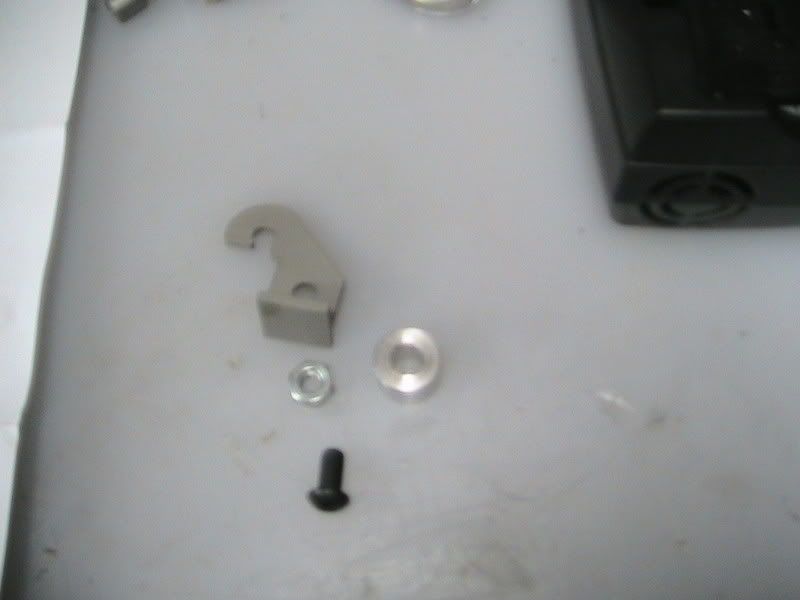
Next, you want to install the kit on your outer ramp/rotator. It's as simple as a bolt, a nut and the part that alters/extends the leverage point. Although it was a pinch type bolt, I used Locktite RED anyway. The bolt is an allen and the nut is 7/16". Not rocket science......
Here it is, pnstalled on the arm.
Note the position of the outer ramp arm with the part on it. It's past the center where the rib/boss is. When you install everything back in the cover, use some thick grease to hold the balls from rolling around and out of a ramp pocket.
Before you put everyting back in the cover, you want to reinstall the cable back into your cover, with the O-ring and the spacer that comes with the kit. The spacer goes on the cable first, then the O-Ring. The cable threads back into the cover and for now, just snug it by hand.
Once the cable is in, you can start putting things back together. You'll need to drop in your inner ramp, (paying attention to the slot the tab goes in in the cover) put grease in the ball cups, add the 3 balls.
I drew a line on the arm and the retainer so you could see which way it goes, as it only fits one way. You need to weasel the cable onto the retainer then get it to go onto the outer ramp, in the slot. It took me 2 tries before I got it. It was snug, but it fits.
Once you get the cable end back in with the retainer, you can place the outer ramp on the inner ramp over top of the balls and reinstall the C-clip retainer to hold everyting in.
Install a new gasket.....
Put the cover back on and tighten the 6 allens to the correct torque, per your manual.
Refill your trans with your preferred fluid and replace the dipstick. I use RedLine Heavy Shock Synthetic, hence the pink coloring.
Tighten your clutch cable into the housing (9/16" wrench) to prevent leaks.
Readjust your cable length and lever play again.
Test ride and enjoy a nice, easier pulling clutch lever. Cable adjustment came out to be about the same, as lengthening the clutch actuation arm's length and bring it closer to the cable end makes the cable longer, but the spacer takes up that slack. The results were impressive and I'm happy with the change.
VIKTIGT! Information gällande tekniska frågor!
Inte medlem på HarleyForum.se? Registrera dig helt gratis här!
Jäss, där kom bilderna jag letat efter!
Tack
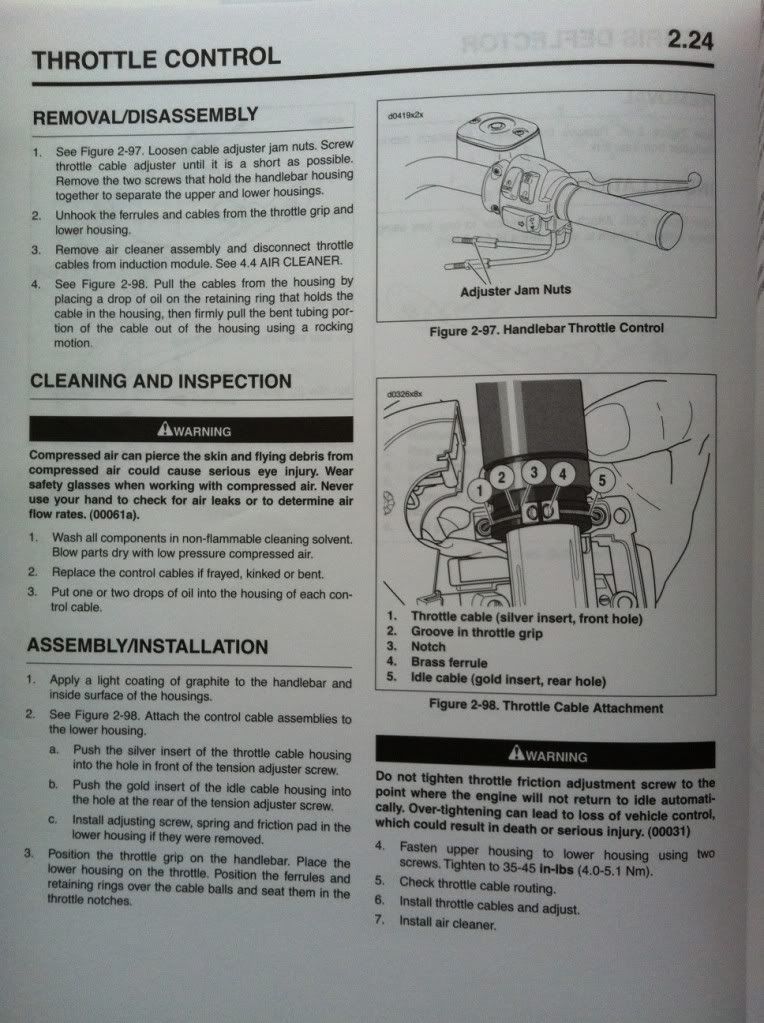
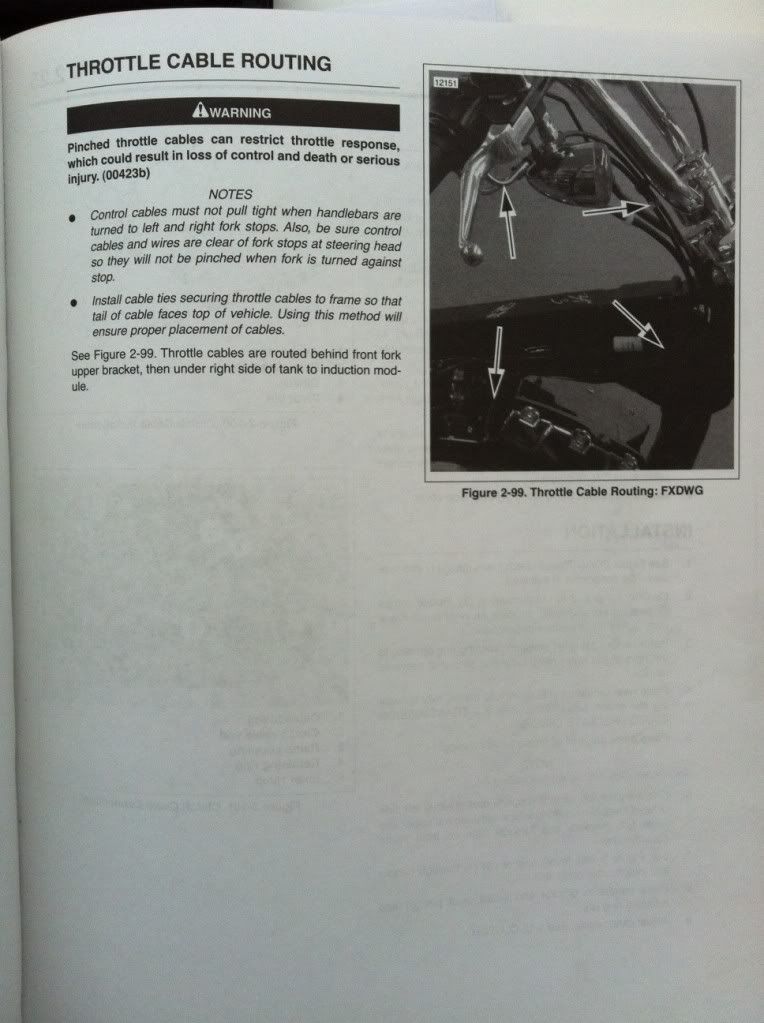
Här kommer bilder från servicemanualen ang gas och koppling. Dyna Street Bob FXDB 2007
VIKTIGT! Information gällande tekniska frågor!
Inte medlem på HarleyForum.se? Registrera dig helt gratis här!
Så där. Klart. Mycket enklare än jag trodde faktiskt.... Tack för tipsen.
 Behörigheter för att posta
 2008 Dyna FXDB
 2001 Sportster XLC
 2007 Dyna FXDB 103cui
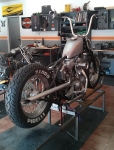 2012 Custom Stelben
 1994 Softail Custom
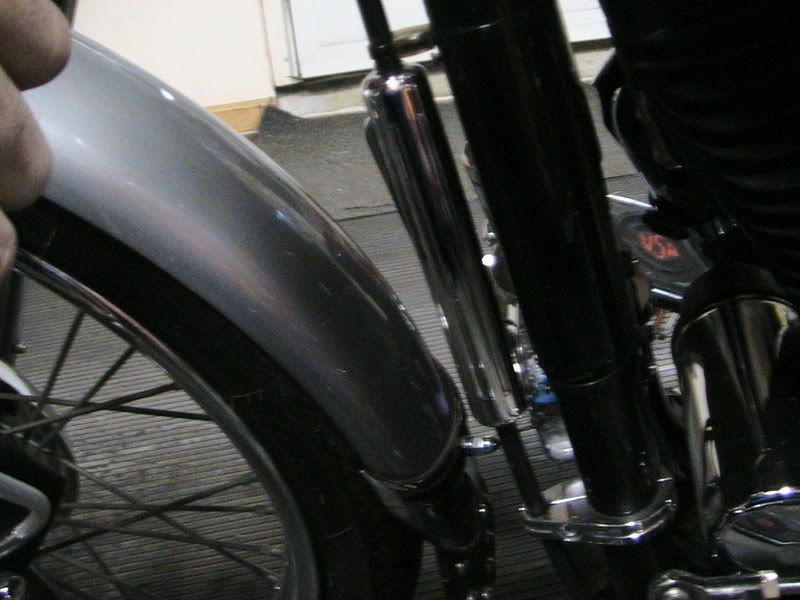


Bokmärken